Whether you're setting up a home theater, giving a business presentation, or enjoying a gaming session, getting the projector screen size just right is crucial for an optimal viewing experience. Adjusting the screen size allows you to maximize image clarity and ensure that everyone in the audience can see the content clearly. In this comprehensive guide, we'll walk you through the step-by-step process of adjusting the projector screen size like a pro. Say goodbye to distorted images or squinting viewers – follow these instructions to achieve the perfect screen size every time.
1. Measure the Projector-to-Screen Distance
The distance between the projector and the screen plays a significant role in determining the screen size. Measure the distance from the lens of your projector to the location where the screen will be placed. This measurement is known as the throw distance and will be essential in calculating the appropriate screen size.
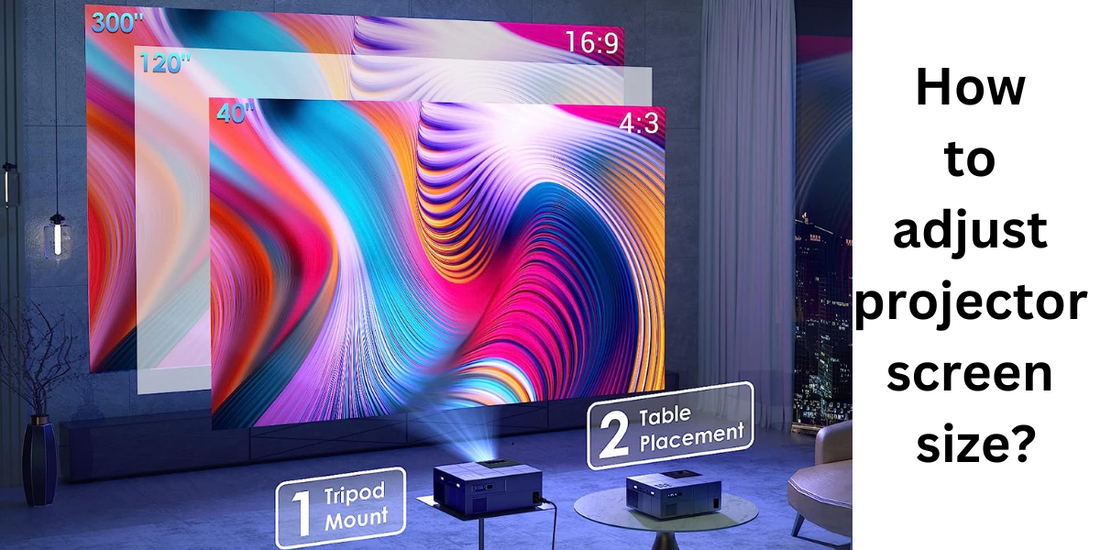
2. Determine the Aspect Ratio
Before adjusting the screen size, consider the aspect ratio of your projector and the content you'll be displaying. The most common aspect ratios are 4:3 (standard), 16:9 (widescreen), and 16:10 (common in some business projectors). Match the aspect ratio of your projector to the aspect ratio of your content for the best display.
3. Calculate the Ideal Screen Size
To calculate the ideal screen size, you can use either of the following methods based on your needs:
a. Throw Distance Calculation:
- For 16:9 aspect ratio projectors: Screen Width (inches) = Throw Distance (feet) / 1.87
- For 4:3 aspect ratio projectors: Screen Width (inches) = Throw Distance (feet) / 1.5
For example, if your projector-to-screen distance is 10 feet and you have a 16:9 aspect ratio projector, the screen width should be approximately 67.38 inches (10 feet / 1.87).
b. Screen Height Calculation:
- For 16:9 aspect ratio projectors: Screen Height (inches) = Diagonal Size (inches) / 2.2
- For 4:3 aspect ratio projectors: Screen Height (inches) = Diagonal Size (inches) / 1.6
If you prefer to determine the screen size based on the diagonal size, you can use these formulas to find the ideal screen height.
4. Mark the Screen Area
Once you've calculated the ideal screen size, mark the area on the wall or screen material where the image will be projected. Use painter's tape or chalk to create a temporary outline, ensuring that it matches the aspect ratio and dimensions you calculated.
5. Test and Adjust
Before permanently fixing the screen in place, test the projected image size by temporarily placing the screen or projecting directly onto the wall. Power on the projector and adjust the zoom or lens shift (if available) to achieve the desired screen size. Pay attention to any image distortion or loss of clarity.
6. Utilize Projector Zoom and Lens Shift
Most projectors come equipped with zoom and lens shift features that allow you to fine-tune the screen size and position. The zoom feature adjusts the size of the image without physically moving the projector, while lens shift moves the projected image vertically or horizontally. Utilize these features to achieve the perfect screen size without compromising image quality.
7. Keystone Correction
If your projector is placed at an angle relative to the screen, the image may appear distorted in a trapezoidal shape – a phenomenon known as keystone distortion. Modern projectors offer keystone correction, which digitally adjusts the image to correct this distortion. While keystone correction can be helpful, it may slightly reduce image quality, so it's best to avoid excessive corrections if possible.
8. Consider Screen Gain
The screen gain refers to the amount of light the screen reflects back to the audience. A higher screen gain enhances brightness but can create narrower viewing angles. Conversely, lower screen gain widens viewing angles but may result in reduced brightness. Consider the lighting conditions in your viewing environment and choose a screen gain that best suits your needs.
9. Account for Screen Masking
If you have a motorized or adjustable screen, you can utilize screen masking to optimize the screen size for different content aspect ratios. Screen masking involves adding black borders to the screen to adjust its shape, allowing you to switch between different aspect ratios seamlessly.
10. Finalize the Screen Position
Once you've achieved the perfect screen size and aspect ratio, securely mount or fix the screen in place. Double-check the screen's position and levelness to ensure a professional and aesthetically pleasing installation.
Conclusion
Adjusting the projector screen size is a critical step in creating an exceptional viewing experience, whether it's for home entertainment, business presentations, or gaming. By following the steps in this guide, you'll be able to master the art of adjusting the screen size, achieving the ideal dimensions, and providing an immersive visual experience for your audience. Remember to consider the projector-to-screen distance, aspect ratio, zoom and lens shift features, keystone correction, screen gain, and screen masking options to tailor the screen size to your specific needs. Now, enjoy a crystal-clear, distortion-free display on your perfectly sized projector screen!